Mail Merge
backWORK IN PROGRESS - Please understand that we are actively rewriting much of our documentation and this page is currently "under construction"; if there's anything that you'd like to see added to and/or expanded upon, please let us know by
sending us a smile.
Introduction
A mail merge is a tool for generating mass mailings, such as form letters. Mail merges contain unique data, such as names and addresses, as well as information that is standard throughout each document. For example, you might use a mail merge to send customers information about a new product or sale, print mailing labels, appointment reminders, or payment due reminders.
Configuration
You have three different items that come into play with a mail merge:
- A data file where your recipients are stored.
- A merge document where you design your merge.
- Finished documents combine the data from your data file with the text in your merge document to create individual documents for the recipients.
To start Your Mail Merge:
The first step of starting your mail merge is choosing your document type.
- Open Word and Select the "Mailings" ribbon. (Tool bar)
- Click the drop-down menu on the Start Mail Merge button in the Start Mail Merge section.
- Choose a document type, Your choices are Letters, E-Mail Messages, Envelopes Labels, and a Directory.
Now that you have selected your document type, you need to tell Word where the data is stored. To do this, you connect your main document to your data file. You can select to use Outlook contacts, create a new list, or connect to an existing list, such as an Excel spreadsheet or a database.

- Click the drop-down menu on the Select Recipients button in the Start Mail Merge section.
- Select Type New List, Use Existing List, or Select from Outlook Contacts.
- If typing a new list, enter your data and save the file.
- If connecting to an existing list, navigate to where the list is saved and select it.
- If choosing Outlook Contacts, select the contact list.
- Clicking a New List brings up this window:
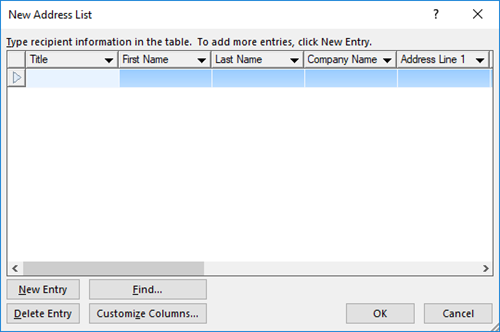
Type the information in the boxes to build your new list.
- Connecting to an existing list opens up the "File Open Dialog" window to find your Excel or Word document.
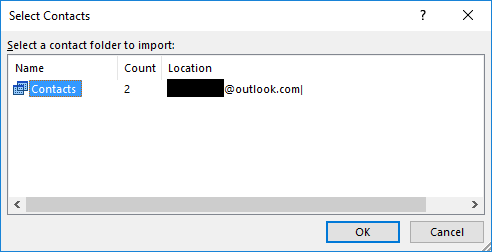
- Clicking on Outlook Contacts brings up the "Select Contacts" window:
Select your list and click OK brings up your contacts list:
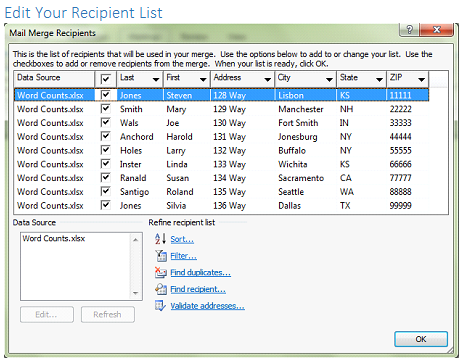
To sort the recipients by a single column. Click the column heading. For example, click Last Name to sort the recipients by last name.
To sort recipients by multiple columns. Click Sort and pick your columns. For example, Last Name, First Name.
To filter the list, click the drop down-drown on the column and remove the selection checks for the names you do not want included.
For a more advanced filter, select Filter and enter multiple criteria. For example, State is equal KS will only merge recipients that live in Kansas.
To remove duplicate recipients. Click Find Duplicates. If duplicate entries are found, remove the selection checks from the names you do not want included.
Set Up
Now that you have your recipients selected, it is time to create your main document. You type your text and then insert merge fields after, or you can insert your fields as you type. You can insert an address block or a greeting line, as well as insert individual fields.
Making labels and envelopes is easy with the Address Block. You can also insert an address block at the top of a formal letter such as a cover letter.
Inserting an Address Block:
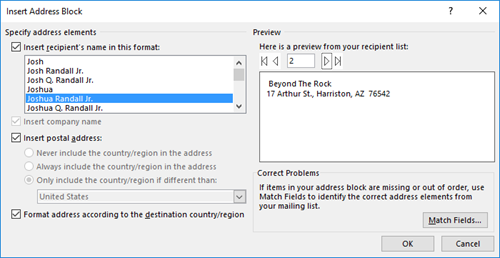
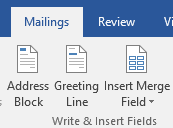
- Click Address Block on the Mailings tab in the Write and Insert Fields section.
- Select the format for the recipient’s name.
- Click OK.
Inserting a Greeting line:
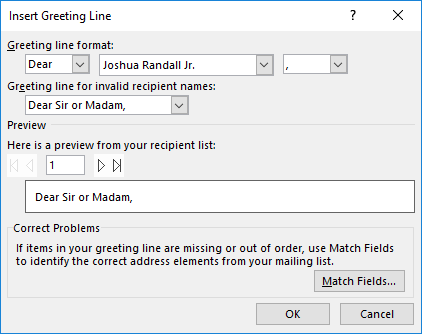
- Click Greeting Line on the Mailings tab in the Write and Insert Fields section.
- Select the format from the dropdown menus.
- Click OK.
Inserting Merge Fields:
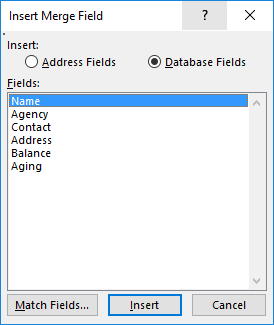
EC The fields you see are individual to the spreadsheet you use.
The Insert Merge Fields drop-down gives you the freedom to insert fields anywhere in your documents.
The drop-down list displays all of the fields from your data file.
- Click in your document where you want the field to be placed.
- Click the drop-down menu on the Insert Merge Field button on the Mailings tab in the Write and Insert Fields section.
- Select the desired field. Make sure to include punctuation before and after each field.
Usage
To use MailMerge efficiently you might want to set up your Excel sheets in advance.
This is one way to do it. Its going to show some basic and advanced filtering in Reports.
You are also going to need the add-on "Export to Excel+".
For this example we will be making a Customer Form letter for late dues.
Showing how to make a spreadsheet using excel.
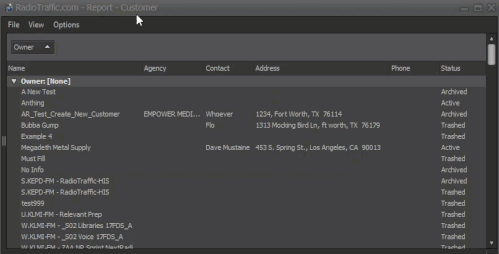
- Loaded up the "Customer" Report.
- Dragged off the "Owner" Tab at the top.
- Dragged off the "Phone#" and "Status" columns.
- Opening the Column Chooser added "Aging" and "Balance".
Then I fine tune the columns to suit my needs:
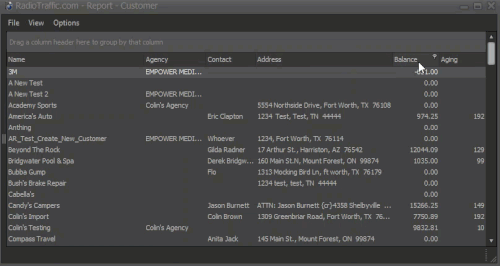
With the use of the "Filter" button. I am able to do the following;
- Filter the Balance column to be 0.00.
- Filter the Balance column to be "Is greater than".
- Filter the Aging column to be a #. (Any number will do.)
- Filter the Aging column to be "Is greater than" and then the number to 89.
Now I am able to Export to Excel.
FAQ
If there's anything that you'd like to see added to and/or expanded upon, please let us know by
sending us a smile.)))
Additional Information
Mail-merge-using-an-Excel-spreadsheet