Work In Progress
backOrder
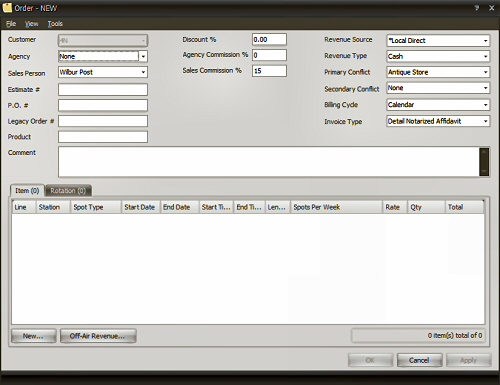
This is the window where all new orders are created.
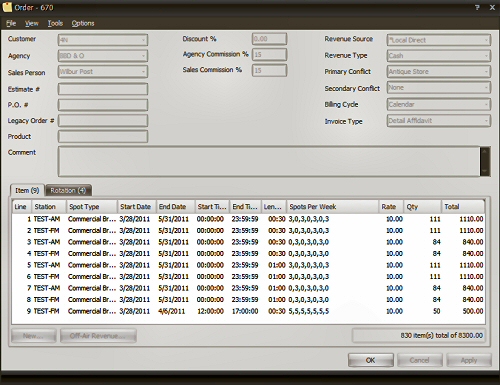
This is the window after an order has been created and you are editing a previously saved new order.
Layout
Across the top of the window you have a menu that gives you access to various features of this window.
The top half of the main part of this window are the order defaults that were set in the customer entry section of RadioTraffic.
The bottom half of the window contains tabs that show either the line items entered for an order or the copy rotations attached to those line items.
Main Menu
File
- Save
Saves the order or changes to the order. This serves the same function as the APPLY button.
- Print
Prints the order as an order confirmation
- Print Preview
Displays the order confirmation on the screen for review or printing.
- Close
This closes the orders window.
View
- Placement Summary
This report shows the placement of the spots within the order on logs after the logs for the days of the order have been created.
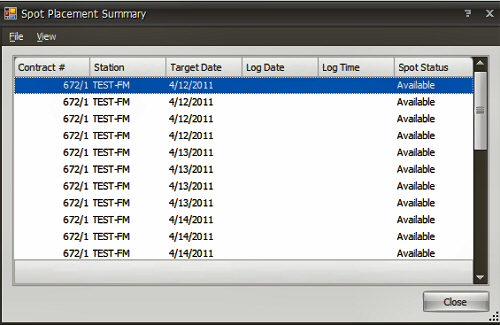
This report is a customizable report. On this report you can see: Cart #; Contact # (in the format of contract number/line item number); Copy name; Log date; Log time; Rate; Spot status; Spot type; Station; Target date
The FILE menu on the placement summary offers the print, print preview and close options. The VIEW menu allows you to reset the layout of the report to Contract #, station, target date, log date, log time and spot status.
- Invoice Summary
This report shows the invoices related to the order viewed.
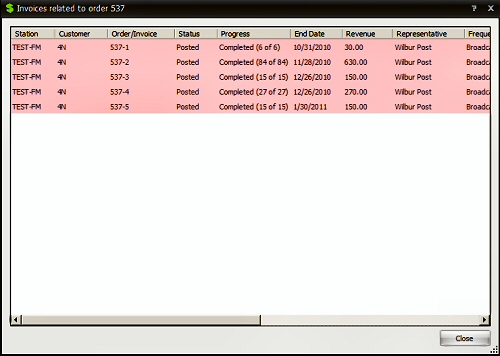
This report is not a customizable report.
- History
This report shows all actions taken upon the chosen order.
This report is a customizable report. On this report you can see: Activity, Comment, Date and User.
Tools
- Approve All
Approves all lines on the order.
- Stop All As Of...
Stops all lines in an order as of a date chosen by the user.
- Cancel All
Cancels all lines immediately.
Order Area
Add a New Order
Click the new button in the bottom left of the order display window.
Edit an Existing Order / Correction Mode
If the order has not been approved, right click on the order you wish to edit and choose open. Make any changes.
If the order has been approved, open the order and choose "Options". Left click to select "Correction Mode." Make any necessary changes and click "Apply" or "OK" to save the changes.
If the order is currently running, you can only make a few changes via the Correction Mode option. You can change most of the header items although those changes will not be retroactive for already finalized invoices.
To edit a currently running line item, enter correction mode. You can change some items in the line item: priority, spot type, copy and rate. If you need anything else changed, you will need to stop and duplicate the order.
Order Details
MenuItem->Save
Item->Print
Item->Print Preview
Item->Close
View->Placement Summary
View->Invoice Summary
DetailsCommentYou can enter a comment regarding this order. This comment will be included on the Invoice and allows you to specify some replacement tokens:
<priormonth> - The name of the month for the invoice end date minus one month.
<month> - The name of the month for the invoice end date.
<nextmonth> - The name of the month for the invoice end date plus one month.
Line Item(s)Rotation(s)Line Item Details (Spot)
MenuItem->Save
Item->Close
View->Placement Summary
View->Invoice Summary
DetailsLine Item Details (OAR)
MenuItem->SaveSaves any addition/change(s) made. Effectively the same as pressing the OK button.
Item->CloseCloses the window, effectively the same as pressing the Cancel button.
View->Placement SummaryProvides a view that allows you to review the results of the entry on an item by item basis.
View->Invoice SummaryProvides a view as to how each item has been invoiced (up to the last invoiced date).
DetailsStationSpecifies which station this OAR is effective for.
Income AccountFor billing purposes, which income account is used.
Start DateEffective start date of the OAR line item.
End DateEffective end date of the OAR line item.
RateSpecifies how much will be billed at each interval (see Frequency).
FrequencyDefines the interval that the invoice generation process will bill the OAR item for the amount specified as the Rate. Daily will occur for every day between the effective start and end dates. Weekly will occur every Monday between the effective start and end dates. Monthly will occur on the 24th of the month between the effective start and end dates.
CommentYou can enter a comment regarding this order line item. This comment will be included on the Invoice and allows you to specify some replacement tokens:
<priormonth> - The name of the month for the billed date minus one month.
<month> - The name of the month for the billed date.
<nextmonth> - The name of the month for the billed date plus one month.
Calculated ResultIn order to better assist the order entry process, we calculate the result of the entered values using the n item(s) total of amount format. You can use this to verify that the values you've entered are what you were expecting as the final result.
OKPress the OK button to save your addition/change(s).
CancelPress the Cancel button to abort any addition/change(s) made.